


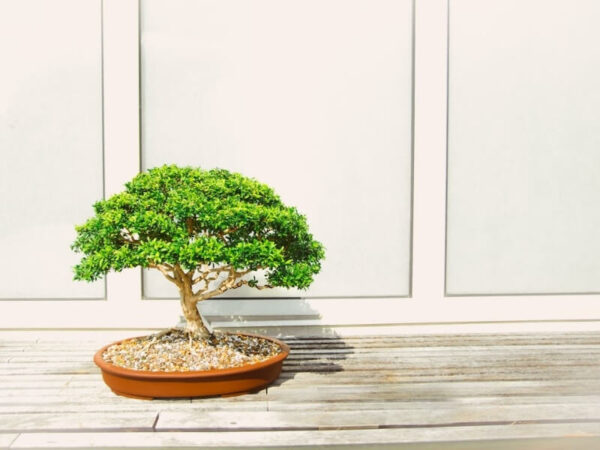
The ancient art of Bonsai can seem mysterious and complex, but it’s a deeply rewarding pursuit that any modern container gardener can embrace. It’s not about stunting a tree’s growth, but about artistically guiding it to create a miniature representation of nature’s grandeur. Your journey begins with choosing the right tree and the perfect pot to call its home. Here’s how to grow a bonsai tree, from choosing a hardy species and the right bonsai pot to caring for it through the seasons.
This guide is part of our comprehensive Tree Planters Guides Resource Hub.
What Is a Bonsai Tree?
A bonsai tree is a regular tree or woody shrub grown in a shallow container and trained over many years to stay small. The word is Japanese for “planted in a container”, and it describes a technique rather than a species. Any tree with a woody trunk and suitably small leaves can be grown this way.
The practice began in China more than a thousand years ago as penjing, miniature landscapes created in trays. Japanese monks carried it across, and over the centuries it was refined into the restrained, single-tree style most people picture today.
Three things are worth knowing before you buy one:
- Bonsai trees aren’t genetically dwarfed. A maple trained as bonsai is the same plant you’d find in a park. Size is controlled through pruning, wiring, root work and a small pot.
- They can live for a very long time. With consistent care, a bonsai tree can last for decades, and some well-kept specimens are several hundred years old.
- Most are outdoor plants. The “indoor bonsai” sold in shopping centres are usually tropical or subtropical species such as jade or ficus. Temperate trees like junipers and Japanese maples need fresh air and real seasons.
Bonsai trees do well in Australia when the species suits the region, with maples and junipers favouring cooler southern areas and figs, jade and native species coping better in the warmer north. Seasons also run opposite to most bonsai books, so spring growth starts around September.
Choosing Your First Bonsai Tree
Selecting a hardy, forgiving species is key to early success. Here are our top beginner-friendly recommendations.

Australian Native Species
- Australian Native Finger Lime: A tough native with small leaves and textured bark. It’s drought-tolerant and even produces tiny, decorative citrus pearls, perfect for unique bonsai displays. Protect young plants from frost. For container growing, this citrus thrives in pots and planters, ideal for small-space orchards.
- Figwood (Ficus opposita): A resilient native fig with small foliage and an adaptable growth habit, ideal for indoor settings or sheltered outdoor positions.
- Dwarf Apple (Angophora hispida): Known for its striking, gnarled bark and small glossy leaves. Responds well to pruning and develops character quickly.
Exotic Species for Beginners
- Chinese Elm (Ulmus parvifolia): A classic beginner’s bonsai. It’s extremely hardy, adaptable, and capable of developing a refined, elegant branch structure.
- Juniper (Juniperus procumbens ‘Nana’): The classic conifer bonsai, with flexible branches that take wire well. It needs full sun and fresh air all year. It’s often sold as an indoor plant, and it declines quickly when kept inside.
- Japanese Maple (Acer palmatum): Loved for its seasonal colour. It needs a cool winter and protection from hot afternoon sun and wind, so it suits southern and highland gardens better than the subtropics.
- Jade Plant (Crassula ovata): A drought-tolerant succulent that forms thick trunks and branches, creating an ancient, mature look with minimal effort. It’s frost-tender, so keep it sheltered.
How to Grow a Bonsai Tree: Step by Step
Growing a bonsai tree is slow by design. From nursery stock, you can have a basic shape within two to three years. A refined tree takes much longer, and a good bonsai is never really finished. The steps below take you from choosing a plant to a tree you can keep shaping.
Step 1: Match the Species to Your Position
Decide where the tree will live before you buy it. Hardy outdoor species suit a bright, open spot with airflow. Tropical species like jade can cope with a bright indoor position. Choosing a tree that matches your climate does more for your success than any technique.
Step 2: Choose Your Starting Material
There are four ways to start, and they trade time against cost.
Nursery stock: Buy a young shrub or tree in a standard pot. This is the best option for beginners. Look for a thick trunk base, branches at different heights and healthy foliage.
Cuttings: Easy for species like Chinese elm, jade and some figs. Expect several years before the trunk thickens.
Seed: The slowest route, often five to ten years before it reads as a tree. Some cool-climate species, including Japanese maple, need several weeks of cold before the seed will germinate.
Pre-bonsai or established trees: These cost more but save years of growth.
Step 3: Pot It in Free-Draining Bonsai Mix
Don’t use garden soil or standard potting mix. Both hold too much water and compact over time, which suffocates fine roots. Bonsai mix is gritty and drains fast. Commercial blends typically combine components such as akadama, pumice and lava rock, and local suppliers sell alternatives.
Young trees thicken faster in a larger container than in a show pot. Many growers keep a tree in a training pot until the trunk and structure are right, then move it into a shallow bonsai pot with large drainage holes.
Step 4: Position and Settle the Tree
Place the tree outdoors in bright light with shelter from strong wind. After potting, keep it out of harsh sun for the first couple of weeks while the roots recover. Introduce it to full sun gradually.
Step 5: Make the First Cuts
Start by removing dead, crossing and inward-growing branches. Choose the front of the tree and leave plenty of foliage, because leaves feed the roots. Never remove more than about a third of the foliage at once, and let the tree respond before you take more.
Step 6: Water, Feed and Be Patient
Check the soil daily and water thoroughly when the surface feels dry. Don’t water to a schedule, because a small pot can dry out within hours on a hot day. Feed with a balanced fertiliser from spring to early autumn, and hold off for a few weeks after repotting. These two habits drive growth more than anything else.
Step 7: Wire and Refine
Once branches are long enough to bend, wire them into position. Aluminium wire is the easiest for beginners. Check it weekly, because wire bites into growing branches quickly.
Step 8: Repot on Schedule
Roots fill a small pot fast. Repot young trees every one to two years, and mature trees every two to five. Do it in late winter to early spring, around August to September in most of Australia, and trim no more than a third of the roots. Use fresh bonsai mix and water well afterwards.
Common Reasons Beginners Lose a Bonsai Tree
- Overwatering or letting it dry out. Both are common, and a fixed schedule makes both more likely.
- Keeping an outdoor species indoors. Junipers and maples are the usual victims.
- Heavy pruning too early. Removing too much foliage starves the tree.
- Fertilising a stressed tree. It adds pressure when the tree can’t use it.
- Leaving a small pot in a heatwave. Shallow pots can dry out within hours in an Australian summer.
How to Care for a Bonsai Tree at a Glance
Bonsai care comes down to a handful of repeating jobs. This table covers the essentials for most bonsai trees, with Australian timing.
| Care task | What to do | When |
| Watering | Check the soil with your finger. Water thoroughly when the top 1 cm feels dry, until water runs from the drainage holes. |
Check daily. Expect to water more often in summer and less in winter.
|
| Light | Outdoor species need 4 to 6+ hours of direct sun. Indoor species need the brightest position available. | Year-round. Shade tender leaves from harsh afternoon sun. |
| Temperature | Match the species to your climate. Protect from frost, and from extreme heat and hot, drying wind. | Move pots to shelter on frost nights and heatwave days. |
| Fertilising | Use a balanced liquid fertiliser or slow-release organic pellets. |
Spring to early autumn. Pause in winter and for 3 to 4 weeks after repotting.
|
| Repotting | Trim no more than a third of the roots and use fresh, free-draining bonsai mix. |
Late winter to early spring (around August to September). Every 1 to 2 years for young trees, every 2 to 5 years for mature trees.
|
| Pruning | Structural cuts while the tree is dormant. Pinch back soft new shoots to keep the shape. |
Heavy cuts in cooler months, light shaping through the growing seaso
|
Choosing a Bonsai Pot: More Than Just a Container
In the world of bonsai, the pot is never an afterthought; it is the essential frame for your living artwork. Its selection is a critical design choice that elevates a simple plant into a cohesive, harmonious composition. The pot grounds the tree, providing context and balance. A well-chosen vessel enhances the story you’re trying to tell, while a poorly chosen one can distract from even the most beautifully trained specimen. Once your bonsai is potted, Planter Lighting 101: How to Uplight Trees and Accent Plants in Pots can help you showcase it beautifully after dark.
Size and Depth

Size and depth form the foundation of stability. A reliable rule is that the pot’s depth should roughly match the diameter of the trunk base, creating a visual anchor that adds presence. Shallow pots are excellent for emphasising age and strength, making the trunk appear more powerful. In contrast, a pot that is too deep can overwhelm the tree, making it look immature and visually drowning its form.
Shape
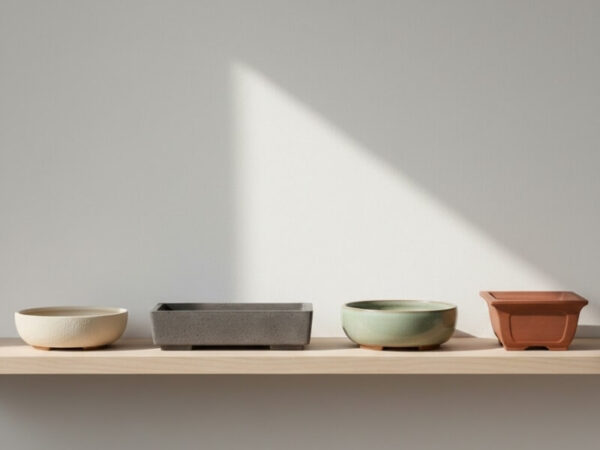
The shape of the pot further defines the tree’s character and movement. Oval and rectangular pots, with their grounding horizontal lines, suit informal upright and slanting styles. Round or square pots complement formal upright trees by reinforcing their symmetrical balance. For dramatic cascading styles, deeper pots provide the physical and visual counterweight needed.
Colour and Finish
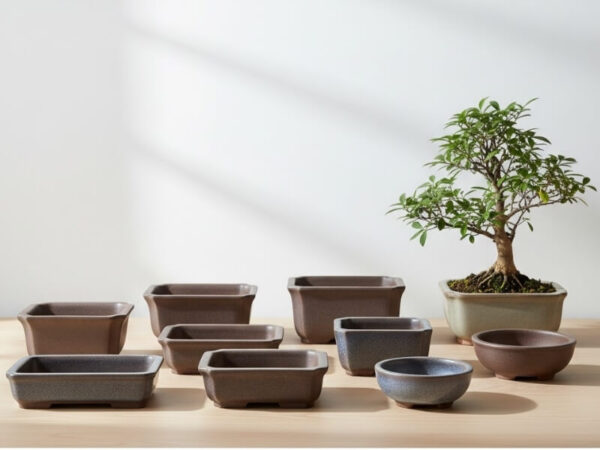
Colour and finish offer the subtle but powerful unifying touch to the composition. Choose a hue that complements the tree rather than competes with it. Earthy tones such as soft browns and muted greys create a natural backdrop for foliage and bark. Light glazes can work harmoniously, but the guiding principle remains: a restrained pot ensures the tree remains the focal point.
Bonsai Basics: Pruning, Wiring, Watering, Feeding & Repotting
Pruning
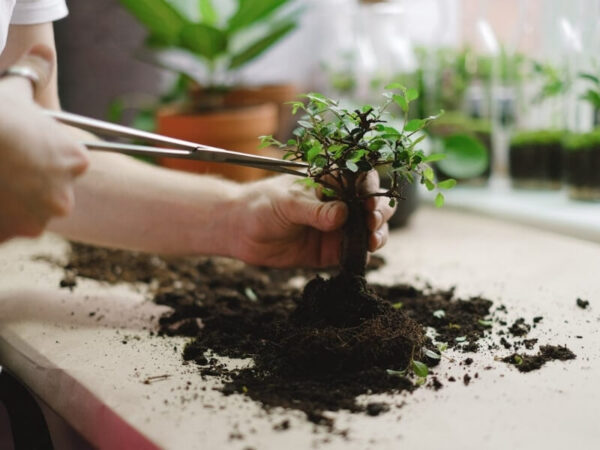
Pruning is how you shape your bonsai and keep it healthy. Think of it as regular “tidying up” to guide growth.
- Pinch back soft new shoots to prevent the tree from getting leggy.
- Use clean scissors to remove branches that cross, grow inward, or disrupt flow.
- Thin crowded areas to improve light and air circulation.
- Highlight the trunk and create small gaps (negative space) for depth.
- Aim for natural balance, not perfect symmetry—real trees aren’t identical on both sides.
- Do major structural cuts in cooler months and small shaping cuts during active growth.
Wiring
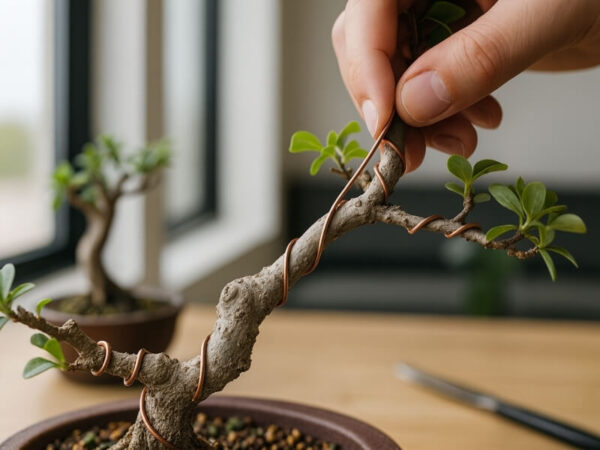
Wiring helps you gently guide branches into the shape you envision—like teaching the tree to pose.
- Use aluminium wire if you’re new; it’s easier to bend and safer for beginners.
- Wrap the wire at a 45° angle so it holds without squeezing the bark.
- Anchor the wire firmly, then bend branches slowly and carefully.
- Check wired branches weekly; fast growth can cause wire to bite in.
- Cut the wire off in small sections after a few months to avoid scarring.
Watering
Watering is the most important bonsai skill—and the one that takes practice.
- Don’t water on a schedule; check the soil daily with your finger.
- Water thoroughly when the top feels dry, until it flows from the drainage holes.
- Never let the root ball dry out completely, but avoid waterlogged soil.
- Expect to water more in summer and less in winter.
- A lightweight pot often indicates the soil is dry.
- Using a well-draining bonsai mix makes watering easier and prevents root rot.
Fertilising
A small pot holds very little food, and regular watering washes out what’s there. Feeding replaces it.
- Feed from spring to early autumn, about every two to four weeks for liquid fertiliser, or use slow-release organic pellets on the soil surface.
- Use a balanced fertiliser. You can switch to a lower-nitrogen feed later to tighten growth.
- Skip feeding for three to four weeks after repotting, and don’t feed a tree that looks sick. A stressed tree can’t use the extra nutrients.
- Ease off in winter, especially with deciduous species that are dormant.
Repotting
Roots fill a small pot quickly. When they circle the inside of the pot or water runs straight through, it’s time.
- Repot in late winter to early spring, just before the buds open. In most of Australia that’s around August to September.
- Young, fast-growing trees need repotting every one to two years. Mature trees can go two to five.
- Trim no more than about a third of the root mass at a time.
- Use fresh, free-draining bonsai mix, and water well afterwards.
- Keep the tree out of strong sun and wind for a couple of weeks while the roots recover.
Growing your first bonsai tree is a rewarding step into a living art form. With a resilient tree, a well-matched pot, and an understanding of these core techniques, you’re fully equipped to cultivate your own miniature landscape—one that grows in beauty and character with each passing season. For larger bonsai specimens or multi-tree landscapes, an extra large planter gives roots room to thrive while maintaining striking visual impact.
Explore our collection of tree planters — built for specimen trees and large-scale landscaping.

0 Comments